
Pruning
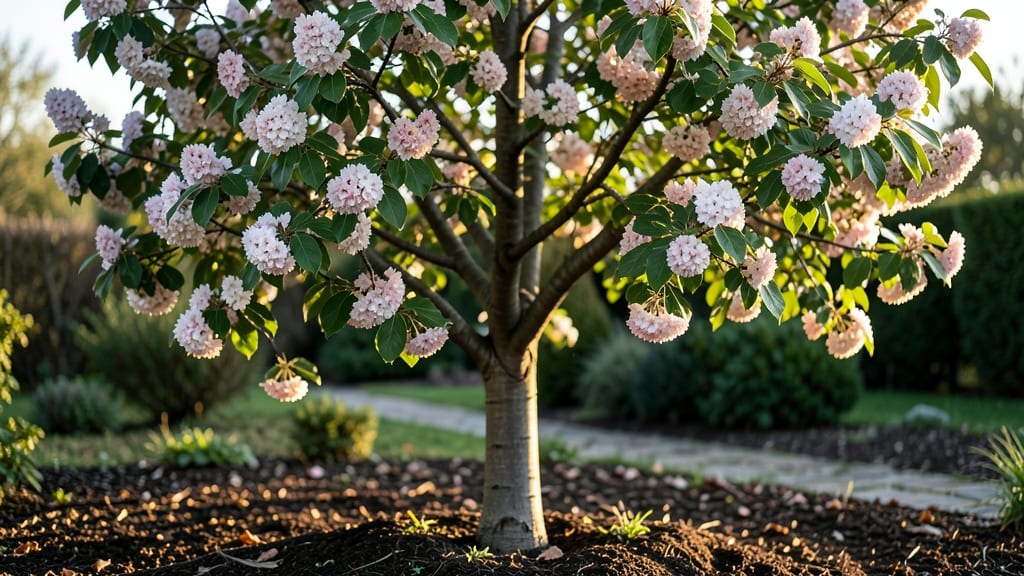
Flowering pear tree size can reach 30-40 feet tall with a 25-35 foot spread—unless you prune them, that is. 🌳 I learned this the hard way when my 'Bradford' nearly kissed the roof of our garage, blocking sunlight for everything else in the yard.
The good news? With strategic pruning, you can keep them at a manageable 20-25 feet while still enjoying their stunning spring blooms.
The secret lies in late winter or early spring pruning—right after flowering but before new growth begins. Focus on removing suckers, crossing branches, and dead wood, and you’ll encourage a stronger structure.
Cultivars like 'Chanticleer' stay slightly smaller (20-25 feet) naturally, while 'Bradford' needs more aggressive shaping to prevent overgrowth. Plant them at least 20 feet from structures to avoid future headaches.
What you’ll end up with is a tree that fits your landscape beautifully—sunlight for understory plants, clear walkways, and no power line conflicts. The blooms stay abundant, and the canopy stays open enough for light to reach the ground.
Think of it as sculpting a living work of art, one cut at a time.
This method works for urban yards, suburban lots, and even large containers if you start with dwarf cultivars. The key is consistency—prune once a year and watch your tree stay in check without sacrificing beauty. Let’s get those shears ready!
📚 In This Guide
- What you need
- Instructions
- Tips and common mistakes
- Wrapping up and next steps
What you need
- ● Pruning shears: Bypass pruners (for cuts up to ½-inch thick). Recommended: Felco F-2 or Corona Tools Classic.
- ● Loppers: For branches ½-inch to 2-inches thick. Look for: Long handles (30+ inches) for reach.
- ● Pruning saw: Curved-tooth saw for branches 2+ inches thick. Tip: Avoid rust—opt for stainless steel.
- ● Gloves: Heavy-duty, cut-resistant gloves (e.g., Mechanix Wear or Fox River).
- ● Disinfectant: 70% isopropyl alcohol or 10% bleach solution (1 part bleach to 9 parts water) to sterilize tools.
- ● Safety gear: Safety goggles (to protect from debris).
- ● Long sleeves/pants (to prevent scratches from thorns).
- ○ Pruning sealant (optional but helpful): Tree wound dressing (e.g., Tanglefoot Tree Wound Pruning Seal) for large cuts.
- ● Knowledge: Familiarize yourself with the flowering pear tree’s growth habits (e.g., blooming season, weak branch points).
- ● Weather check: Prune on a dry, calm day (avoid rain or wind).
- ● Tree health assessment: Inspect for diseases (e.g., fire blight) or pests before pruning.
- ● Plan your cuts: Sketch a rough outline of branches to remove or shape.
- ● Extension pole: For hard-to-reach branches (e.g., 6–10 ft. telescoping pole).
- ● Ladder: Sturdy, non-slip ladder (e.g., aluminum step ladder, 8+ ft. height).
- ● Work bag: To organize tools and debris.
- ● Camera/phone: Document “before” and “after” shots for tracking growth!
Step-by-step pruning guide for managing flowering pear tree height
Here’s how I keep my flowering pear trees at a manageable height without sacrificing their stunning spring blooms.
✂️ Step 1: Assess the Tree’s Structure and Growth Habits
First, examine the tree’s current height and branching pattern. Flowering pears typically grow 15-25 feet tall when unpruned, but you can control their height by focusing on the central leader (the main upward-growing branch). Look for water sprouts—those fast-growing vertical shoots that pop up between branches—and suckers at the base, which compete for energy and disrupt the tree’s shape.
Use a notebook and pencil to sketch a simple diagram of the tree’s structure. Mark the branches you want to retain for bloom production (usually the scaffold branches—the main horizontal limbs). This visual guide helps you plan cuts precisely. I always prune in late winter or early spring, just before buds swell but before flowers appear, to avoid removing next year’s blooms.
✂️ Step 2: Remove Dead, Diseased, or Crossing Branches First
Start by eliminating any dead, dying, or diseased branches—these are easy to spot because they’re brown, brittle, or lack leaves. Cut these back to the collateral bud (a side bud) just below the damaged area. Use clean, sharp pruning shears to make a clean cut at a 45-degree angle, about ¼ inch above the bud, sloping away from it to prevent water from pooling.
Next, remove any branches that cross or rub against each other. These create wounds that invite disease and weaken the tree’s structure. If two branches grow too close, prioritize removing the smaller one or the one growing upward to maintain an open canopy. This step ensures the tree’s energy isn’t wasted on competing growth.
✂️ Step 3: Thin the Canopy to Improve Airflow and Light Penetration
To control height and encourage healthier blooms, thin the canopy by selectively removing 20-30% of the smallest branches from the interior. Focus on branches that grow straight up or too densely packed—these block light and air, leading to fungal issues. Start at the outer edges and work inward, cutting branches back to a side bud or lateral branch that faces outward.
Here’s the trick: never remove more than ¼ of the tree’s foliage in one season. Over-pruning stresses the tree and reduces next year’s flower production. After thinning, step back and visualize the tree’s shape. You want an open, vase-like structure that allows sunlight to reach all branches, ensuring even blooming.
✂️ Step 4: Control Height by Pruning the Central Leader
To manage the tree’s height, focus on the central leader. If you want to keep the tree under 12 feet, start by cutting the leader back to a strong lateral branch that’s at least ⅓ the diameter of the leader. This forces the tree to grow wider rather than taller. Make the cut just above a bud that faces outward to encourage horizontal growth.
For a more gradual height reduction, you can top the leader by cutting it back by ⅓ each year over several seasons. Avoid cutting too close to the trunk—this can create a weak stub that invites decay. After pruning, apply pruning sealant (optional) to larger cuts over ½ inch in diameter to reduce the risk of disease.
✂️ Step 5: Clean Up and Monitor for New Growth
After pruning, sterilize your tools with rubbing alcohol to prevent spreading disease. Collect and dispose of all pruned branches—don’t leave them on the ground, as they can harbor pests. Rake up any fallen leaves or debris around the tree’s base to improve airflow and reduce moisture retention.
Over the next few weeks, watch for new growth from the buds you left behind. If you see vigorous water sprouts popping up, remove them promptly to redirect the tree’s energy into the branches you want to keep. Regularly inspect the tree throughout the growing season, and prune lightly as needed to maintain its shape. With consistent care, your flowering pear will stay at your desired height while still putting on a spectacular spring show.
Tips & tricks for managing flowering pear tree size
Real talk: Pruning a flowering pear tree isn't just about wielding shears—it's about strategic cuts that preserve those showstopping blooms while keeping your tree at a manageable height. Here's what nobody tells you about doing it right.
Timing is Everything: That late winter to early spring window is non-negotiable. When buds begin to swell but flowers haven't yet appeared, you're hitting the sweet spot between avoiding next year's blooms and catching potential winter damage. I've learned this the hard way after accidentally pruning too early and losing half my spring flowers. The tree's sap is flowing but not yet fully active, making it much more resilient to pruning.
The 25% Rule: Never remove more than 25% of the tree's foliage in one season—this is your golden number. I once overzealously pruned 40% of a young tree's canopy and was rewarded with sparse blooms the following spring. The tree needs its foliage to photosynthesize and build energy for next year's flowers. Think of it like giving your tree a spa day—you want to refresh it, not exhaust it.
Visualize First: Before making a single cut, step back and visualize your tree's final shape. I sketch a rough outline on paper, marking where I want branches to grow. This helps me see how cuts will affect the overall structure. Look for branches that grow straight up or are too densely packed—these are your targets for thinning. The goal is an open, vase-like shape that lets sunlight reach all branches, which is crucial for even blooming.
Tool Maintenance Matters: Your pruning shears are your most important tool, and they need to be in top shape. I sterilize mine with rubbing alcohol between cuts to prevent spreading disease, and I sharpen them regularly. Dull blades tear rather than cut cleanly, which can damage the tree and make it more susceptible to infection. A clean, sharp cut heals faster and looks better too.
Pro Tips for Flowering Pear Tree Size
- Real talk: Pruning a flowering pear tree isn't just about wielding shears—it's about strategic cuts that preserve tho...
- Timing is Everything: That late winter to early spring window is non-negotiable. When buds begin to swell but flowers...
- The 25% Rule: Never remove more than 25% of the tree's foliage in one season—this is your golden number. I once overz...
Frequently asked questions
Got questions about managing your flowering pear tree’s size?
You’re not alone! Here are answers to the most common concerns—from pruning timing to troubleshooting woody growth.
How tall does a flowering pear tree typically grow?
A standard flowering pear tree can reach 20–30 feet tall at maturity, but dwarf varieties stay between 12–15 feet. If your tree is outgrowing its space, pruning in late winter or early spring (before buds swell) can help control its height while preserving its stunning blooms.
When is the best time to prune a flowering pear tree for size control?
Prune late winter or early spring (just before new growth starts) to avoid removing next year’s flower buds. Avoid heavy pruning in fall—it can stimulate weak growth vulnerable to frost damage. Light shaping in summer (after flowering) is fine, but avoid cutting back more than 25% of the canopy at once.
Can I prune a flowering pear tree in summer?
Yes, but only for minor shaping—never for major height reduction. Summer pruning can stress the tree and reduce next year’s blooms. If you must prune, do it after flowering (June–July) and avoid cutting into old wood, which may not regrow well. Focus on removing suckers or crossing branches instead.
Why does my flowering pear tree have so many suckers?
Suckers (shoots from the base or roots) are common in flowering pears and can be removed by cutting them at the base with pruners or a spade. They drain energy from the main tree, so pull or prune them as soon as they appear. Mulch properly (2–3 inches of organic mulch) to discourage future suckers.
How do I prevent my flowering pear tree from getting too leggy?
Leggy growth happens when the tree isn’t pruned regularly or gets too much sun. Prune selectively to encourage a balanced shape—focus on:
- Removing vertical water sprouts (shoots growing straight up).
- Thinning out dense inner branches to improve airflow.
- Pruning backward-growing branches to open the canopy.
Wrapping up and next steps
Choosing the right flowering pear tree size for your space—and mastering pruning—can transform your yard into a stunning, low-maintenance oasis. 🌸 Whether you opt for a compact dwarf variety or a classic standard, consistent care will keep it thriving for decades. Now’s the perfect time to act!
Ready to shape your tree’s future? Grab your tools and schedule a pruning session—spring or early summer is ideal. Start small, observe growth patterns, and soon you’ll have a flowering pear tree that’s both beautiful and perfectly sized for your landscape.